Brolly has updated progress monitoring for all Brolly 2.0 users! The old version of progress monitoring will still be available for anyone who prefers to continue using it for the rest of the 23/24 school year.
What's New in the Updated Progress Monitoring?
- Progress monitoring is now similar to service tracking with a Quick Select menu and grid view
- Users are now able to log multiple days and sessions quicker
- Users are now able to view past progress monitoring logs as they log
- Users can log for archived students and/or goals
- Ability to edit multiple progress monitoring logs at once
To use the update version of progress monitoring, click on the Progress monitoring tab on the homepage and select "Create a new progress monitoring log."

Next, click the "Check it out!" link at the top of the progress monitoring page to be taken to the update version. You do not have to use the updated version if you prefer to continue to use the old version for now.

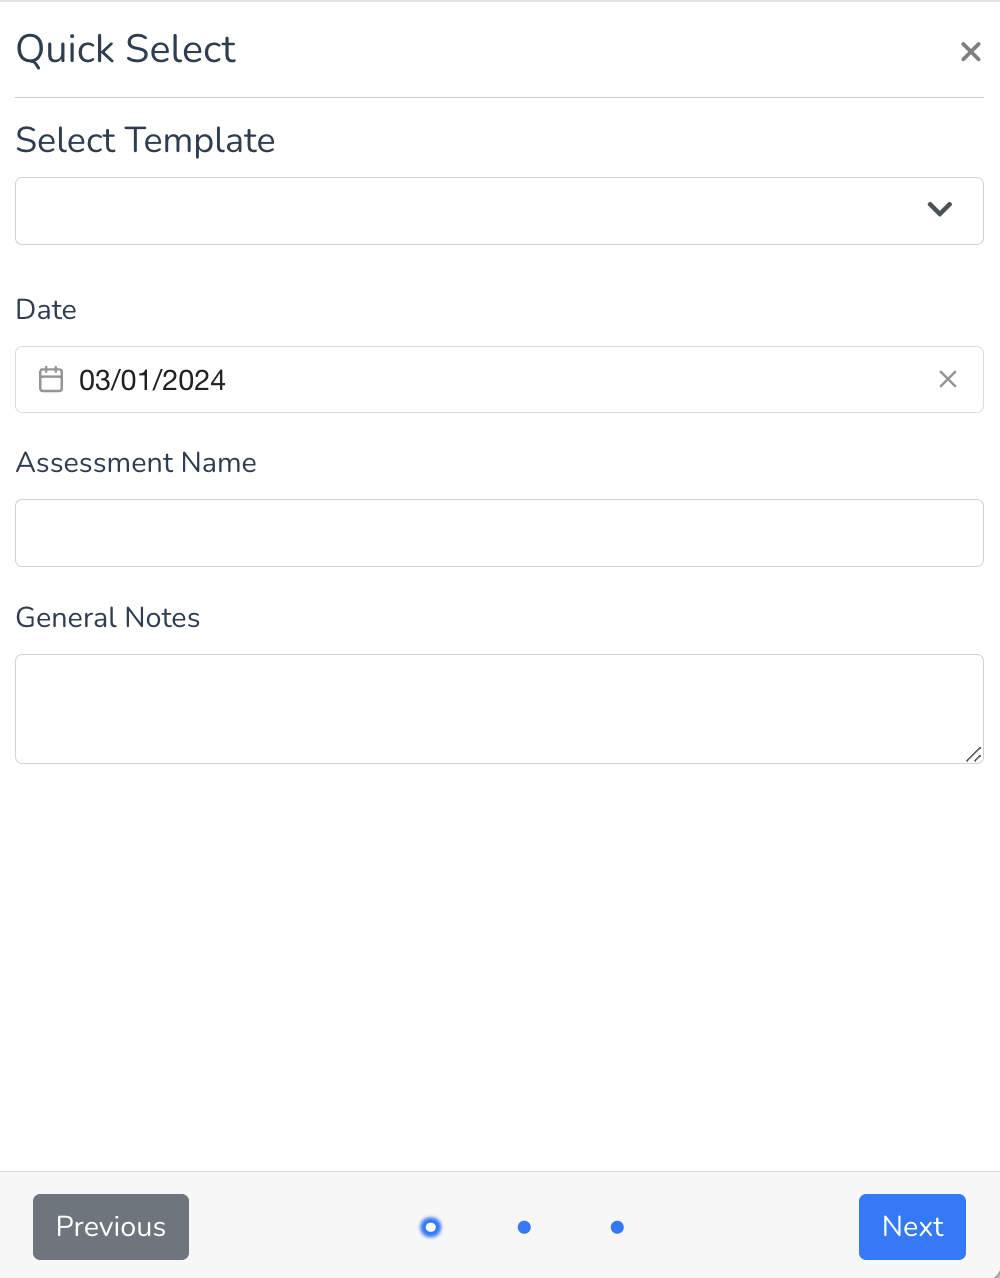
In the Quick Select popup, you have the option to select a template. If you do not want to use a template, skip to the date of the assessment(s) you are logging for.
Next, you have the option to add the assessment name and general notes. If you enter this data on the Quick Select page, it will be appear for all students you select. If students had different assessments or different notes, you can skip these fields.
Once you have completed the information on the first page of the Quick Select, click "Next" in the lower right-hand corner.
On the second page of the Quick Select, you will choose the student or students you are progress monitoring. If you selected a template on the first page, you will see those students in the template already selected. You can always select additional students.
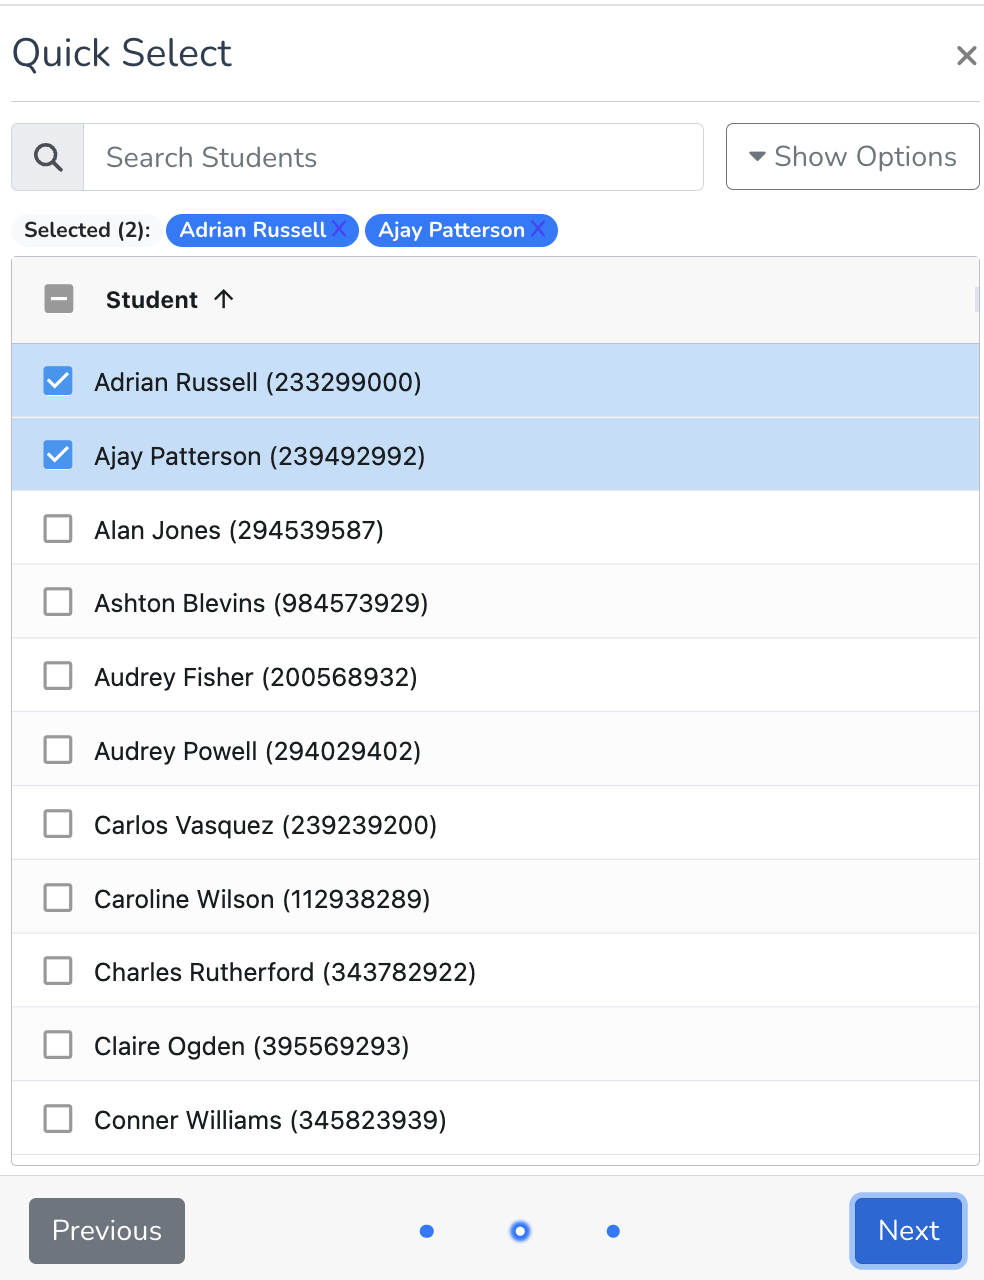
If you do not see a student you expect to see available, they might have been archived. With the new progress monitoring, you are able to log for archived students. Click on "Show Options" and select "Show Archived Students" to see students on your caseload that might have been archived.

Once you've selected the students you would like to log for, click "Next" at the bottom of the page.
The last page of the Quick Select will allow you to select the goal(s) and benchmarks/objectives for each student. If you are using a template, goals will be selected based on what is in the template. If not using a template, you will see need to select a goal or goals for each student. Once you select the goal, you can also select a benchmark/objective.
Note: Brolly has added a new option to select both the goal level and benchmarks for the same log. To utilize this new feature, you will select "Goal Only" for the goal level log and then select additional benchmarks/objectives.


If you are needing to log for an archived goal or benchmark/objective, check the "Show Archived" box at the top of the page to view archived goals. The archived goals will have a red dot next to them.

Once all goals are select, click "Done" in the bottom right-hand corner of the page.
After you have completed the Quick Select information, you will now be able to edit additional information in the grid view. Note: You must click "Submit All" to complete your logs after you finish the Quick Select information.

In the grid view, you can update or edit any information. Double click on any cell to update the information or add additional information. You may need to scroll to the right to see some columns.
Make sure to fill in the following columns in order to be able to submit your logs:
- Date
- Student
- Goal(s)
- Benchmark(s)
- Assessment Name
- Assessment Score
- Progress
- Image (optional)
- Notes (optional)

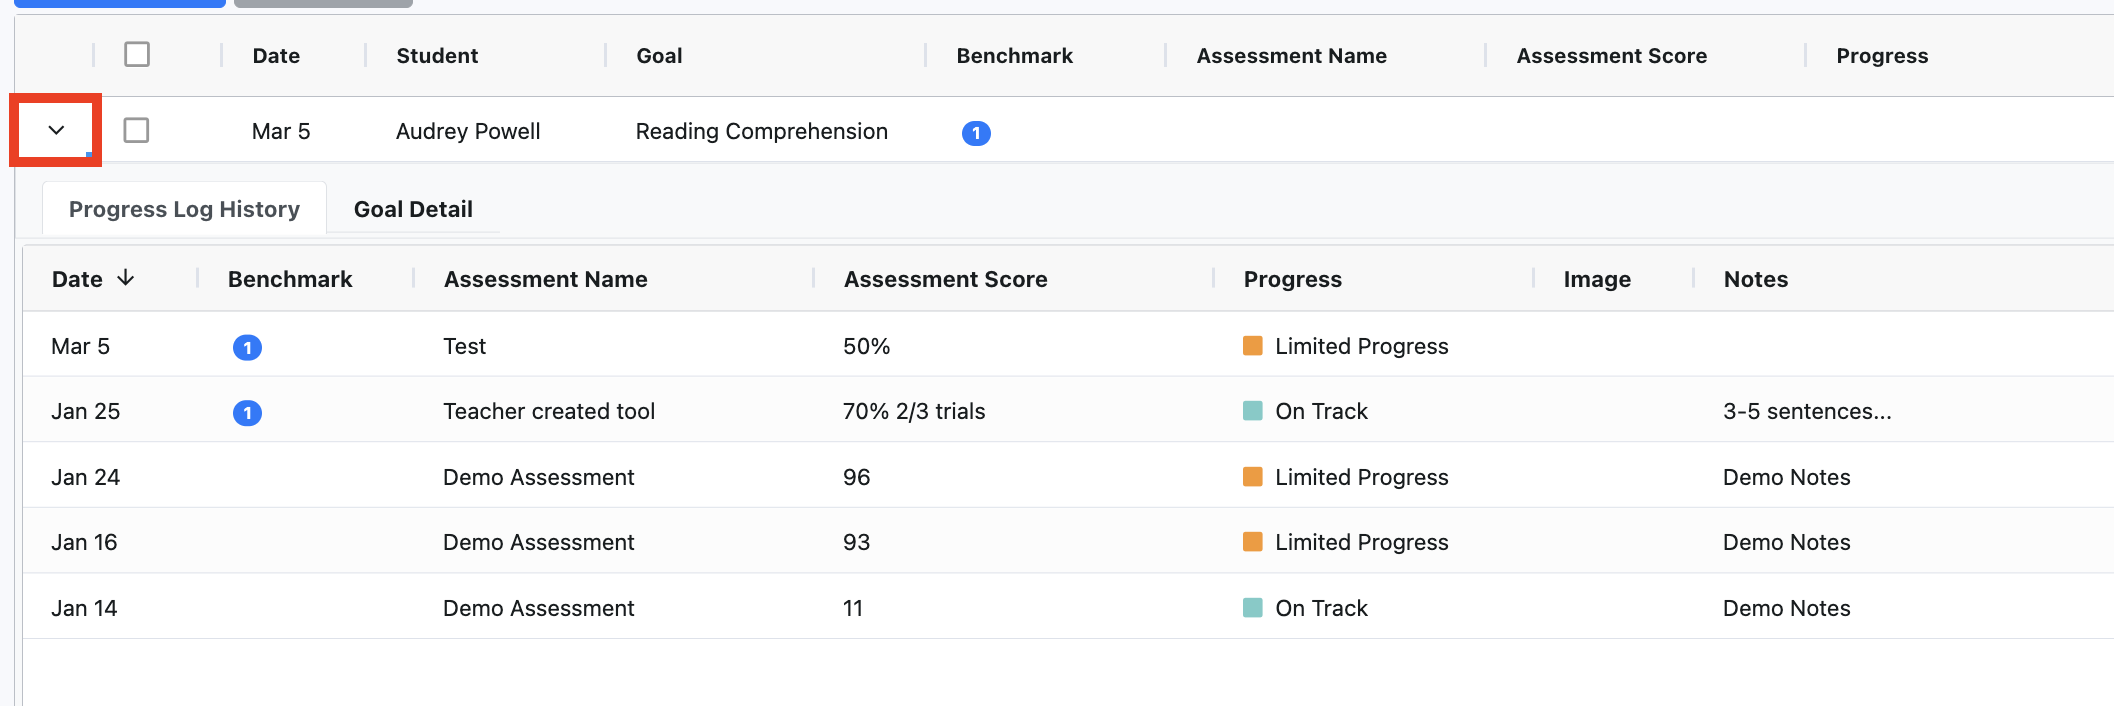
While logging, you can choose to view previous progress monitoring logs for a goal and the full goal information. Click on the arrow to the left-hand side of the goal to view previous entered progress monitoring logs.
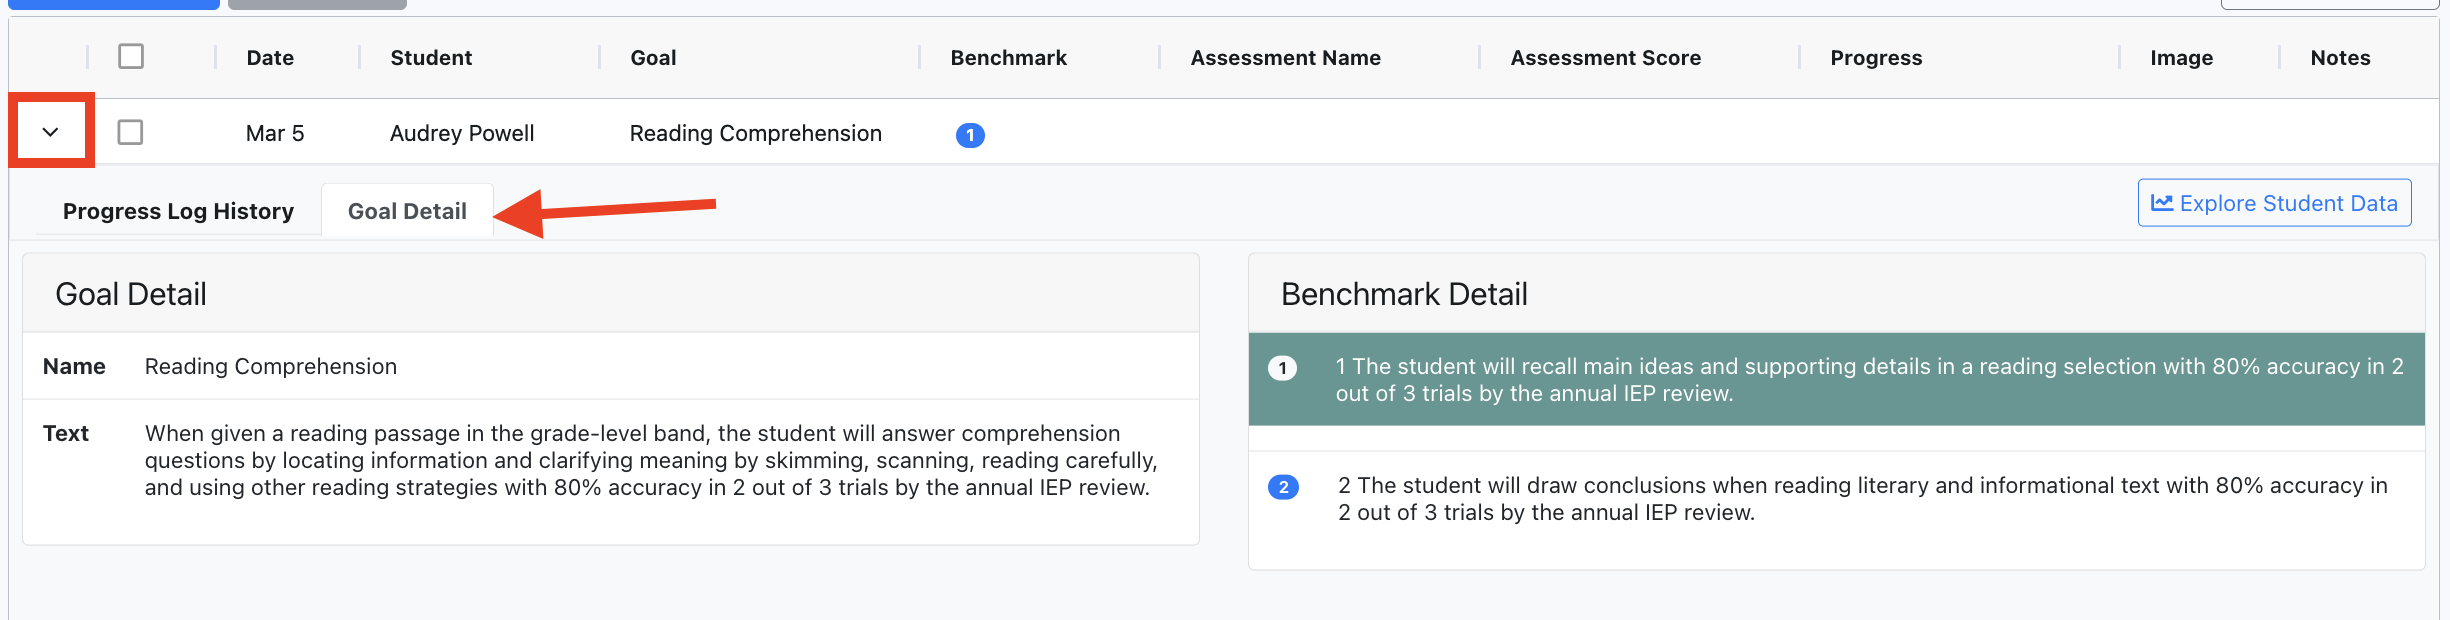
To see the full goal information, click the arrow and then select the Goal Detail tab.
Once you completed your logs, click "Submit All." A green dot will appear next to any logs that are successfully submitted.

If a log is missing information or can not be submitted, a yellow triangle will appear. Hover over the triangle to see what has caused the error.

After you submit logs, you can continue to edit on the page progress monitoring page. If you make any changes, select "Submit All" again and only edits will be submitted. You will not submit duplicate logs.
Click on Quick Select to add additional progress monitoring logs and follow the directions above.